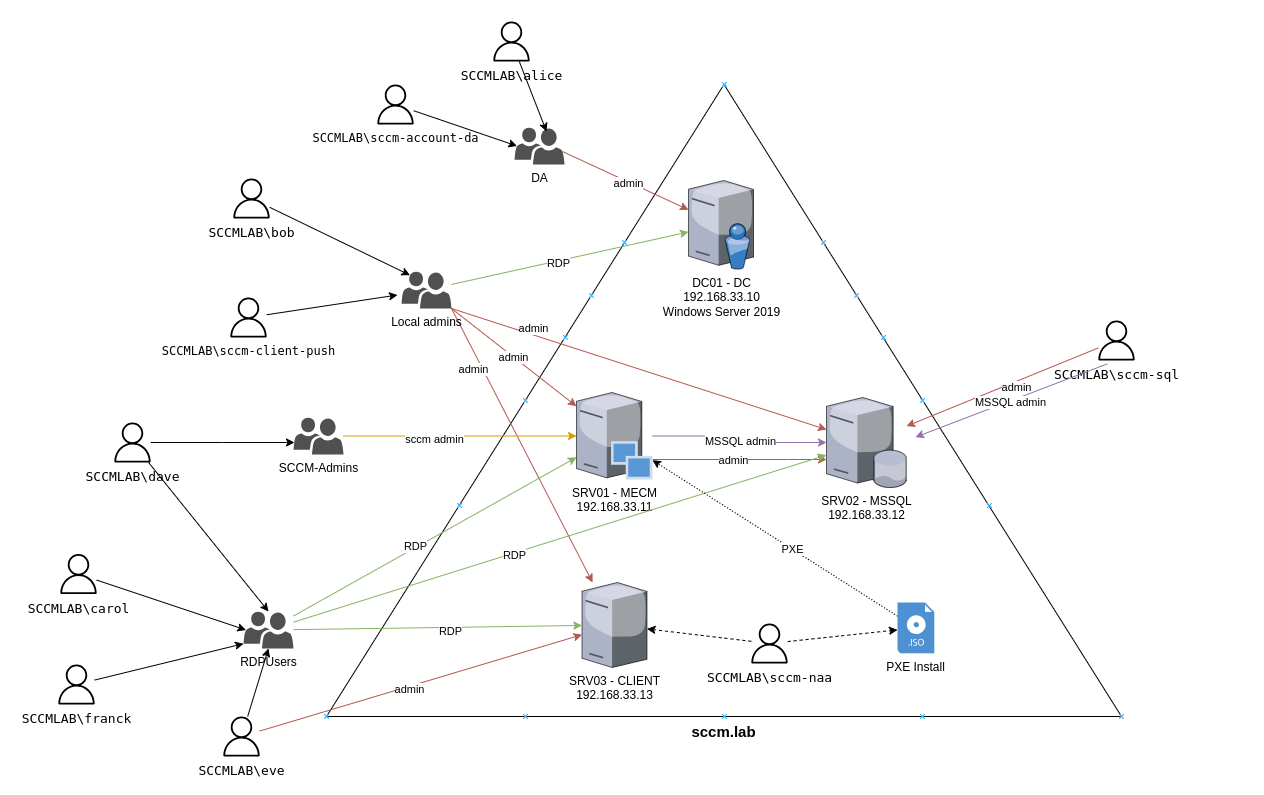
Game of Active Directory (GOAD) - SCCM
Huge shout out to @M4yFly for all the hard work to create GOAD SCCM!

1. Add the Windows 2019 template to Ludus
git clone https://gitlab.com/badsectorlabs/ludus
cd ludus/templates
ludus templates add -d win2019-server-x64
[INFO]  Successfully added template
ludus templates build
[INFO]  Template building started - this will take a while. Building 1 template(s) at a time.
# Wait until the templates finish building, you can monitor them with `ludus templates logs -f` or `ludus templates status`
ludus templates list
+----------------------------------------+-------+
|                TEMPLATE                | BUILT |
+----------------------------------------+-------+
| debian-11-x64-server-template          | TRUE  |
| debian-12-x64-server-template          | TRUE  |
| kali-x64-desktop-template              | TRUE  |
| win11-22h2-x64-enterprise-template     | TRUE  |
| win2022-server-x64-template            | TRUE  |
| win2019-server-x64-template            | TRUE  |
+----------------------------------------+-------+
2. On the Ludus host, clone and setup the GOAD project
By default, GOAD will use Ludus to create a new users (GOADxxxx) for each new lab. If you want to use a specific name/user:
- Create the user with Ludus
- Set the API key for that user
- Disable impersonation by setting
use_impersonation = noin~/.goad/goad.ini
GOAD will deploy to whatever user you currently "are" (based on exported Ludus API key).
git clone https://github.com/Orange-Cyberdefense/GOAD.git
cd GOAD
sudo apt install python3.11-venv
export LUDUS_API_KEY='myapikey'  # put your Ludus admin api key here
./goad.sh -p ludus
GOAD/ludus/local > check
GOAD/ludus/local > set_lab SCCM # GOAD/GOAD-Light/NHA/SCCM
GOAD/ludus/local > install
Now you wait. [WARNING] lines are ok, and some steps may take a long time, don't panic!
This will take a few hours. You'll know it is done when you see:
[*] Lab successfully provisioned in XX:YY:ZZ
If you encounter errors with TASK [sccm/install/iis : Install .Net Framework 3.5 with DISM] or similar, update the failing machine with ludus:
ludus testing update -n GOADd126ca-SCCM-MECM # Replace GOADd126ca with your GOAD UserID
# Wait for all updates to be installed.
# Be patient, this will take a long time.

# When you see the following, the updates are complete:
localhost                  : ok=5    changed=0    unreachable=0    failed=0    skipped=0    rescued=0    ignored=0
GOADd126ca-SCCM-MECM       : ok=8    changed=5    unreachable=0    failed=0    skipped=0    rescued=0    ignored=0
Optional: Add a Kali VM
ludus --user GOADd126ca range config get > config.yml # Replace GOADd126ca with your GOAD UserID
vim config.yml # Edit the file to add a Kali VM (see below)
ludus --user GOADd126ca range config set -f config.yml
ludus --user GOADd126ca range deploy -t vm-deploy
# Wait for the deployment to finish
ludus --user GOADd126ca range logs -f
# Deploy the Kali VM
ludus --user GOADd126ca range deploy --limit localhost,GOADd126ca-kali
The added Kali VM should look like this at the end of the ludus: block:
  - vm_name: "{{ range_id }}-kali"
    hostname: "{{ range_id }}-kali"
    template: kali-x64-desktop-template
    vlan: 10
    ip_last_octet: 99
    ram_gb: 4
    cpus: 4
    linux: true
    testing:
      snapshot: false
      block_internet: false
3. Snapshot VMs
Take snapshots via the proxmox web UI or SSH run the following ludus command:
ludus --user GOADd126ca snapshot create clean-setup -d "Clean GOAD SCCM setup after ansible run"
4. Hack!
With your WireGuard connected on a client machine (your laptop, etc.), access your Kali machine (if you deployed one) at https://10.RANGENUMBER.10.99:8444 using the creds kali:password. Or you can access the lab directly from your client machine with WireGuard connected and attack the 10.RANGENUMBER.10.X subnet.